

Appearance
Pressure Application
Our test fixtures use two primary methods for applying pressure to PCBs: Pressure Pins and Pressure Application Pads. Pressure Pins are the standard choice for rigid PCBs, while Pressure Application Pads are used for specialized applications like flex PCBAs or high-density boards where space is limited.
Pressure Pins
Pressure pins provide controlled downward force on the DUT (Device Under Test), ensuring reliable contact with the test probes below.
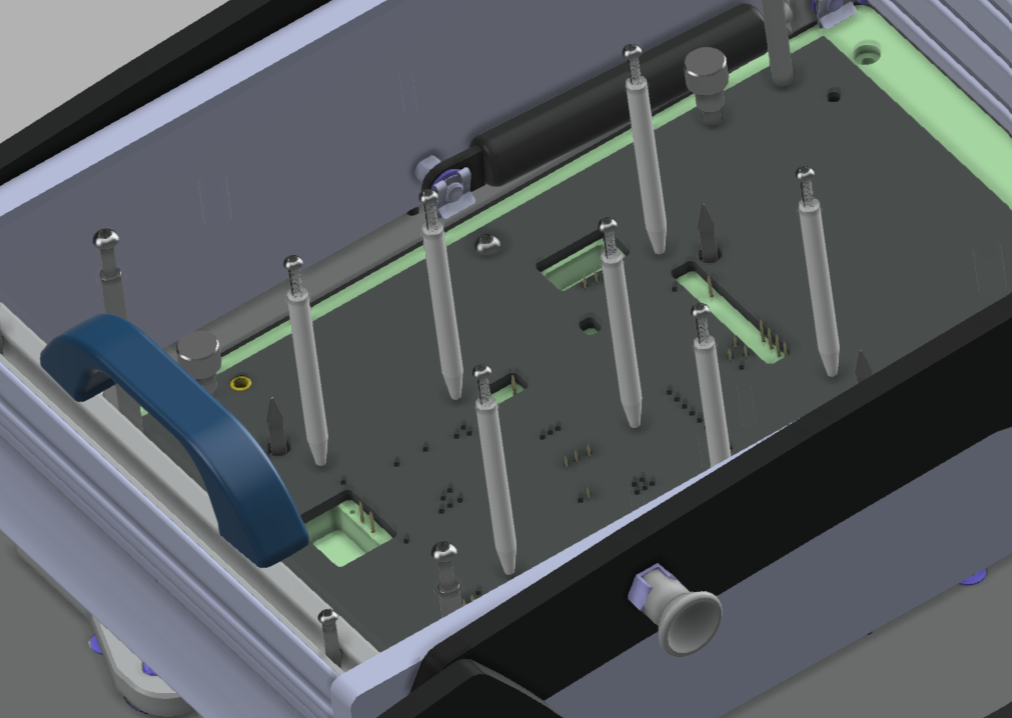
These precision-machined components are manufactured from durable engineering plastics:
- Acetal (Delrin)
- POM (Polyoxymethylene)
Pin lengths are standardized across our fixture families:
- 35mm length
- Used in Dev Pro and Dev Pro XL fixtures
- 45mm length
- Used in Dev and Dev XL fixtures
- 65mm length
- Used in all Ingun cartridges and fixtures
For Ingun fixtures specifically, we incorporate a 7mm diameter countersink that's 3.2mm deep in the pressure plate. This accommodates standard 6mm diameter pressure pins while providing optimal force distribution for 1.6mm thick PCBs.
Placement Guidelines
- Position pins over rigid areas of the PCB, away from flex regions.
- Align with component-free zones to avoid crushing parts.
- Distribute pins to provide even pressure across the board.
- Consider probe locations — pins should push the board toward the probe contact points below.
Pressure Application Pad
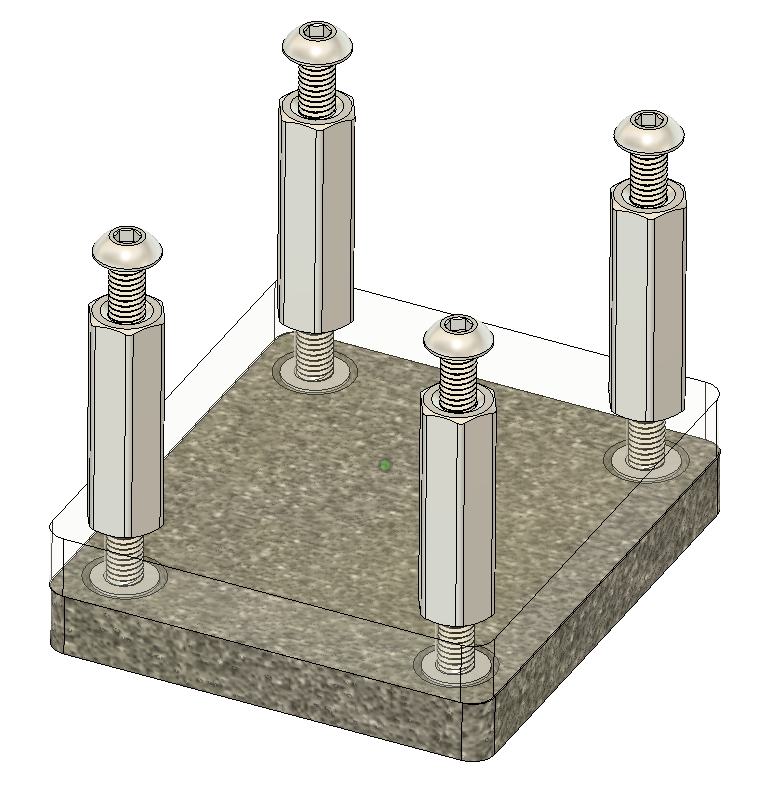
The Pressure Application Pad system combines a rigid plate (polycarbonate or acrylic) with a compliant polyethylene pad. This assembly provides even pressure distribution, making it ideal for:
- Flex and rigid-flex PCBAs
- High-density PCBAs where traditional pressure pins cannot fit
- Applications requiring gentler, more distributed force
The pad assembly mounts securely to the pressure plate using M3 or M4 standoffs, ensuring consistent pressure application across the entire test area.
Selection Guide
| Application | Recommended method |
|---|---|
| Standard rigid PCBs | Pressure pins |
| Flex circuits | Pressure pads |
| High-density layouts | Pressure pads |
| Quick changeover needed | Pressure pins |
| Sensitive surface components | Pressure pads |
Best Practices
- Match pin length to the fixture — use the specified length for your fixture type.
- Secure pins properly — M3 × 10 mm screws keep pins from backing out.
- Check pin condition — replace worn or damaged pins.
- Verify contact — confirm the probes make contact with pins engaged.
- Balance pressure — distribute pins and pads for even force application.