

Appearance
Configuring a Fixture
Once a DUT has a test config, Studio can turn it into a priced, buildable fixture. The fixture configurator is a six-step funnel — DUT, cartridge, hardware, fixture, details, review — that walks you from board selection to a quote, with a running cost estimate visible the whole way.
To start, open Fixture Configurations in the sidebar and click New configuration. You can also reopen an existing configuration from the list, or pick up where you left off — a configuration is saved as you go.
The build summary
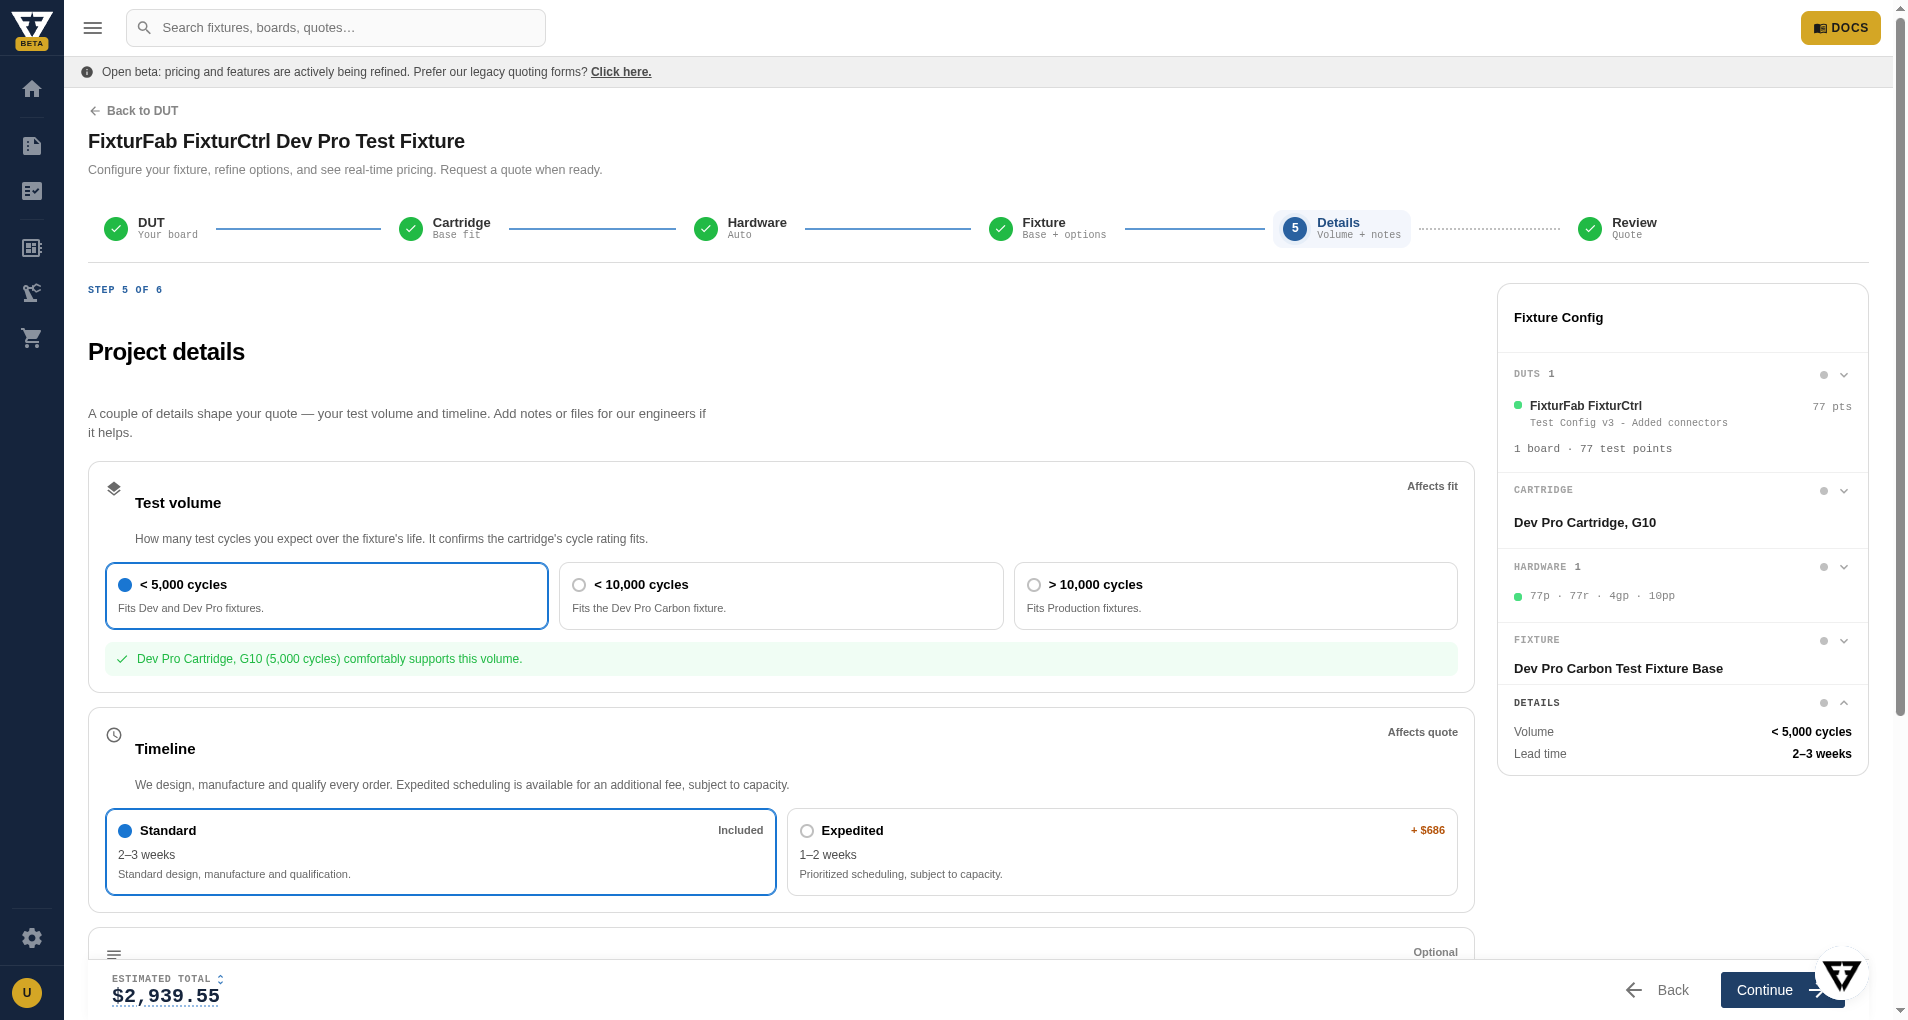
A summary rail runs down the side of every step, building up as you make selections: the boards you picked, the cartridge, the hardware rollup, the fixture base and options, and your project details. The estimated total updates in real time once a cartridge is chosen, so you can see how each choice moves the price before you commit. Each section collapses to keep the rail compact.
Step 1: DUT
Pick the board (or boards) this fixture will test. Your DUTs appear as a searchable card grid — select one to add it, and it moves to the top. Only DUTs with a saved test config can move the funnel forward; if a DUT has more than one saved test config version, you choose which version to bring in.
If you select more than one board, a layout section lets you set how they're arranged — multiple copies, or a panel grid with rows and columns.
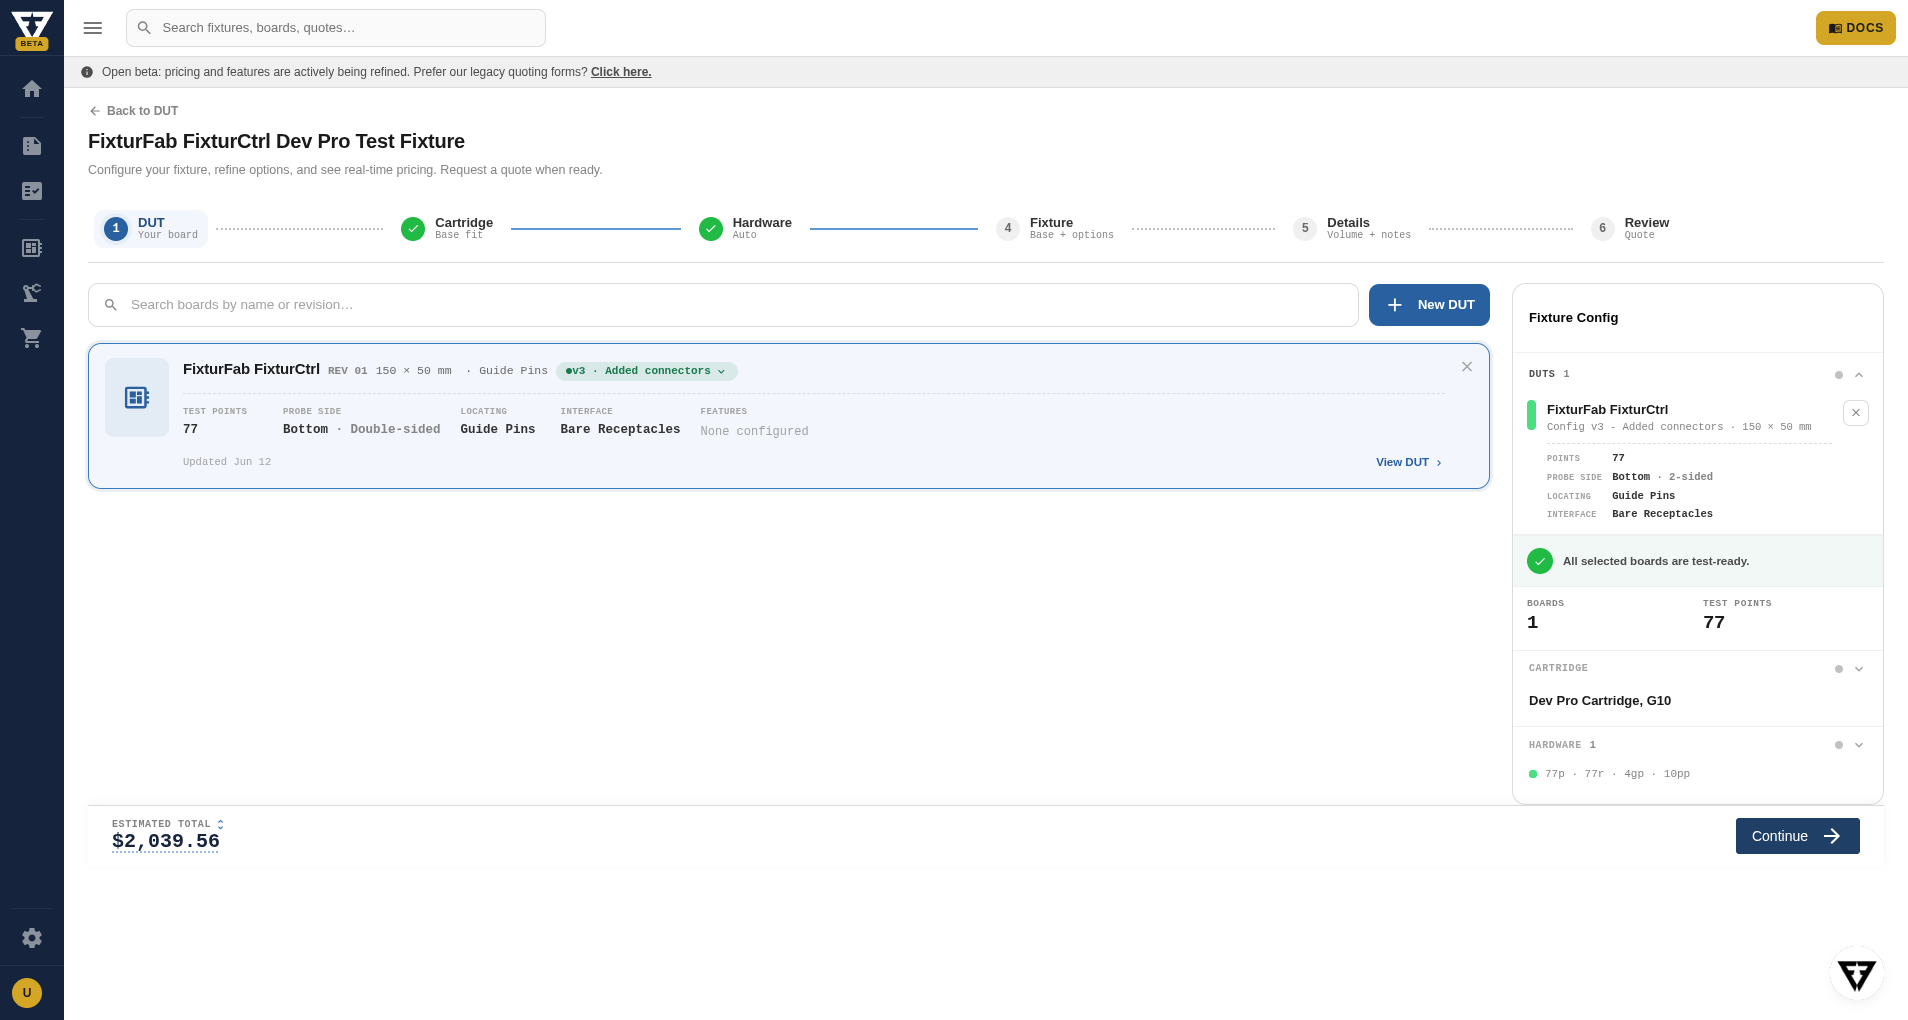
Click Continue when your boards are selected.
Step 2: Cartridge
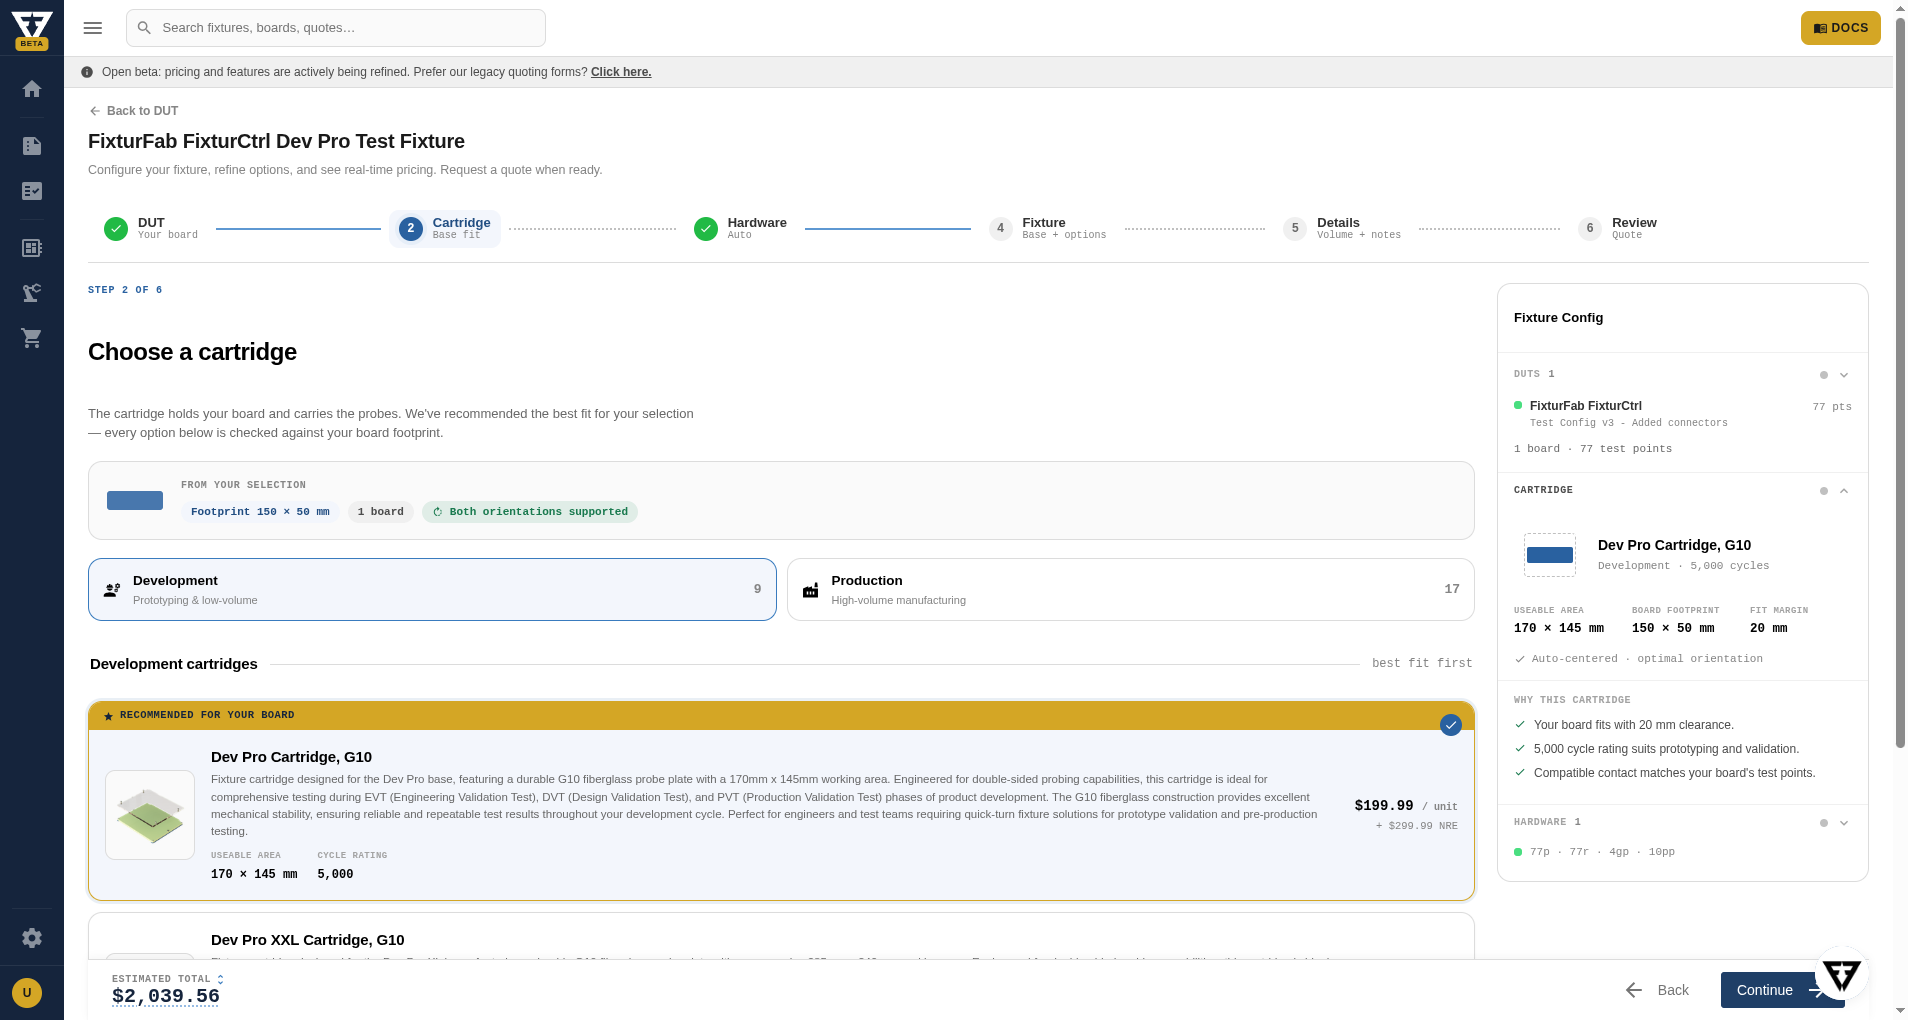
The cartridge holds your board and carries the probes. Studio recommends the best fit for your selection and checks every option against your board footprint, so the list only shows cartridges that physically fit.
Toggle between Development and Production cartridges to see the options for each, with the recommended one flagged and the best fit listed first. Use Show more if you want to see options beyond the top picks.
Step 3: Hardware
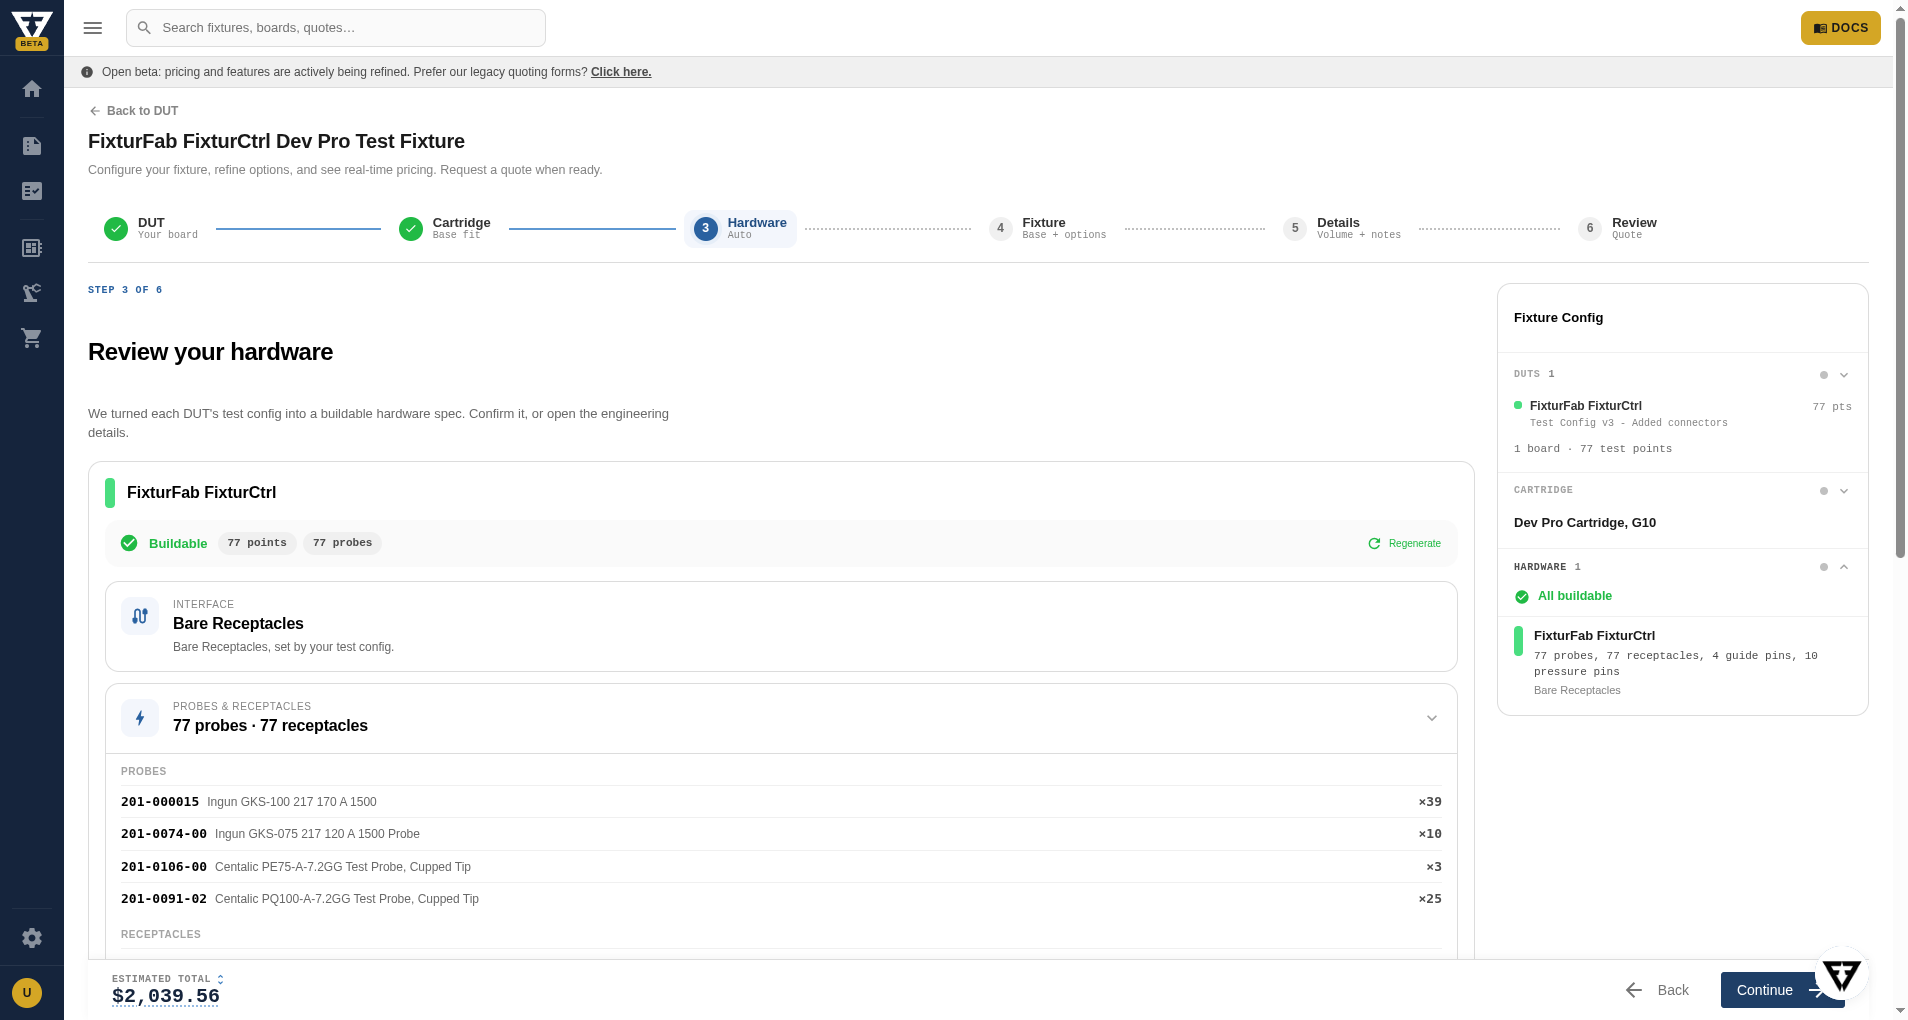
Studio turns each DUT's test config — its test points, locating holes, and pressure plan — into a buildable hardware spec automatically. This step shows the result for each board: the probe, receptacle, guide-pin, and pressure counts, with a verdict telling you whether everything is in order.
If you've edited a DUT's test config since this was generated, Regenerate re-runs the conversion. Expand Cartridge layout to see how the boards lay out on the plate. For full manual control over individual probes, receptacles, and parts, expand Advanced / engineering details — see Advanced Hardware Configuration.
TIP
For most fixtures the auto-generated hardware is exactly right — confirm it and keep moving. The advanced editor is there when an engineer needs to swap a specific probe or part.
Step 4: Fixture
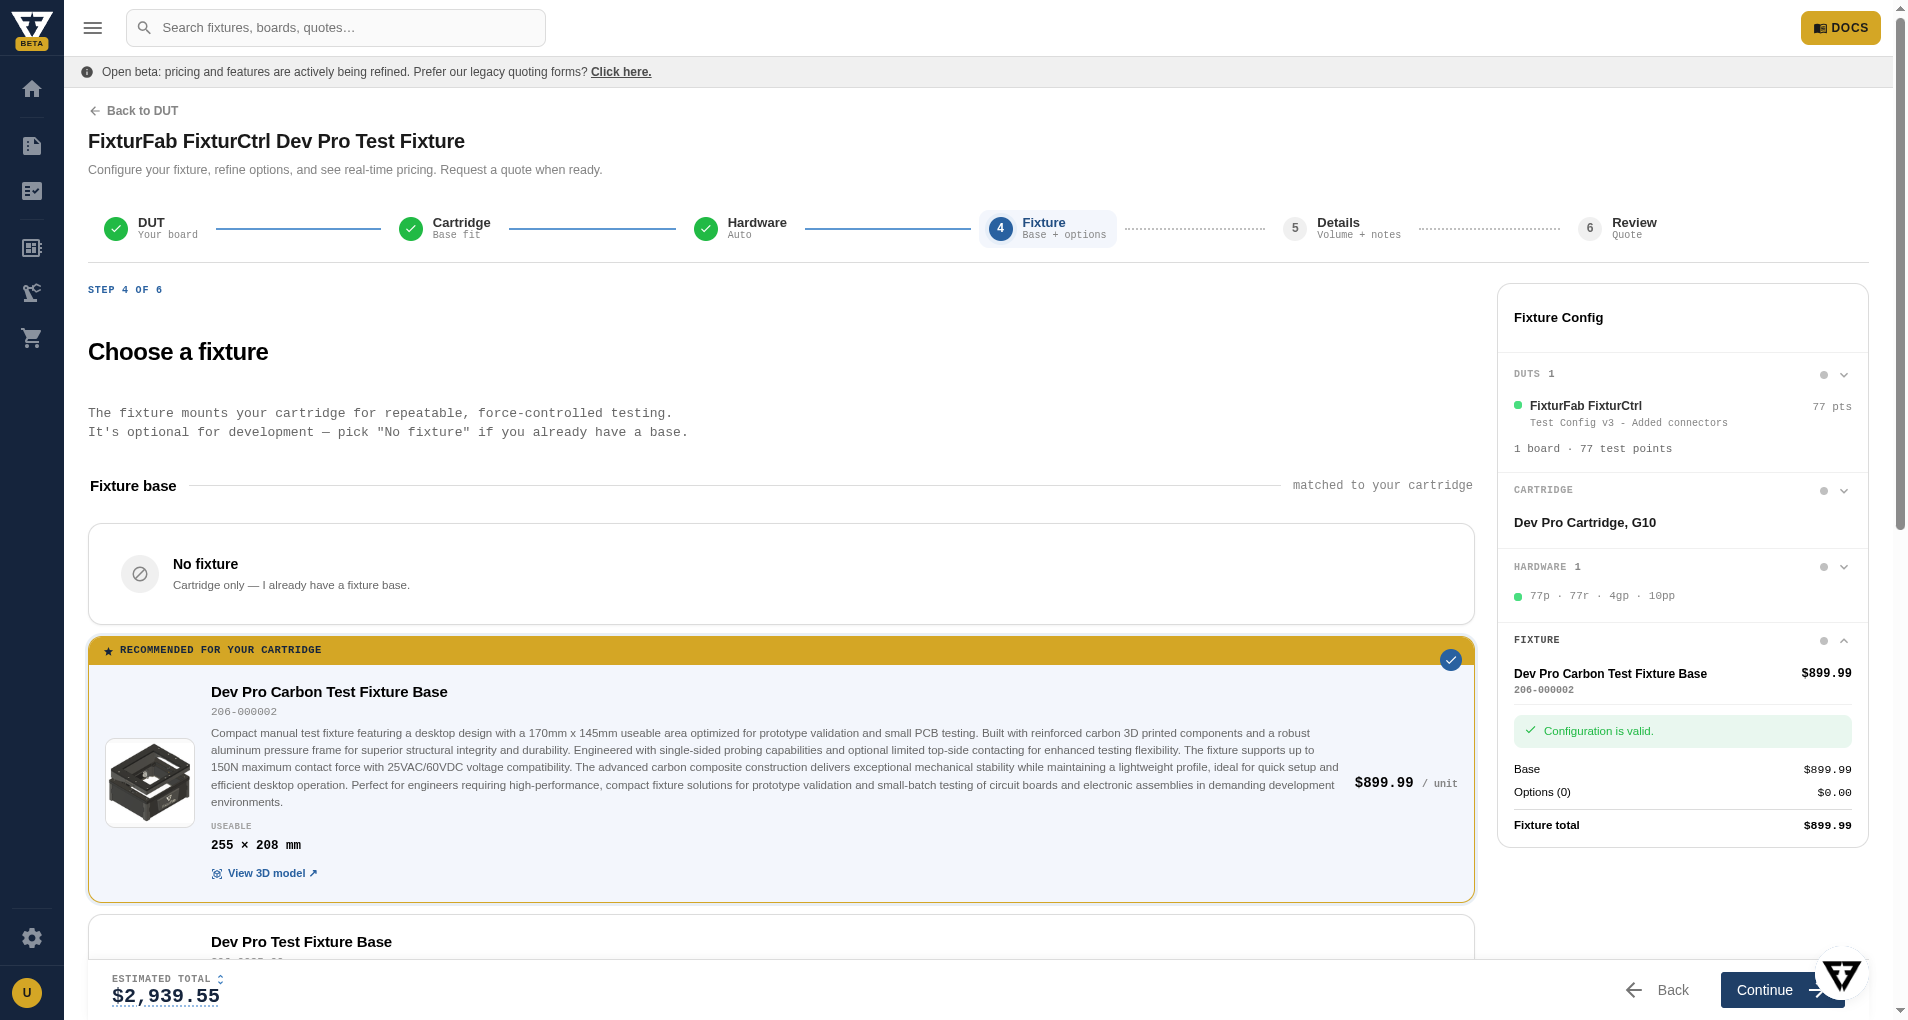
The fixture base mounts your cartridge for repeatable, force-controlled testing. It's optional for development — pick No fixture if you already have a base. The bases shown are matched to your cartridge, with the recommended one flagged.
Below the base, Fixture options lets you add capabilities like switching and power. Some options depend on others (for example, a cycle counter needs a fixture switch); when a dependency isn't met, the step tells you what's missing and offers a one-click fix before you can continue.
Step 5: Details
A couple of details shape your quote. Set your test volume — measured against the cartridge's cycle rating — and your timeline, where choosing expedited adds a rush fee. Add notes or upload files for our engineers if there's anything they should know about your project.
Step 6: Review
The final step lays out your whole configuration — boards, cartridge, hardware, fixture, and details — as a set of recap cards. Each card has an Edit link to jump straight back to that step if something needs changing.
The order panel on the right is where you set quantities and see the full price. Set how many fixture bases and cartridges to order, then review the pricing breakdown: NRE, materials, labor (with any volume discount applied), and an expedite line if you chose a rush timeline. View pricing breakdown opens the line-by-line detail.
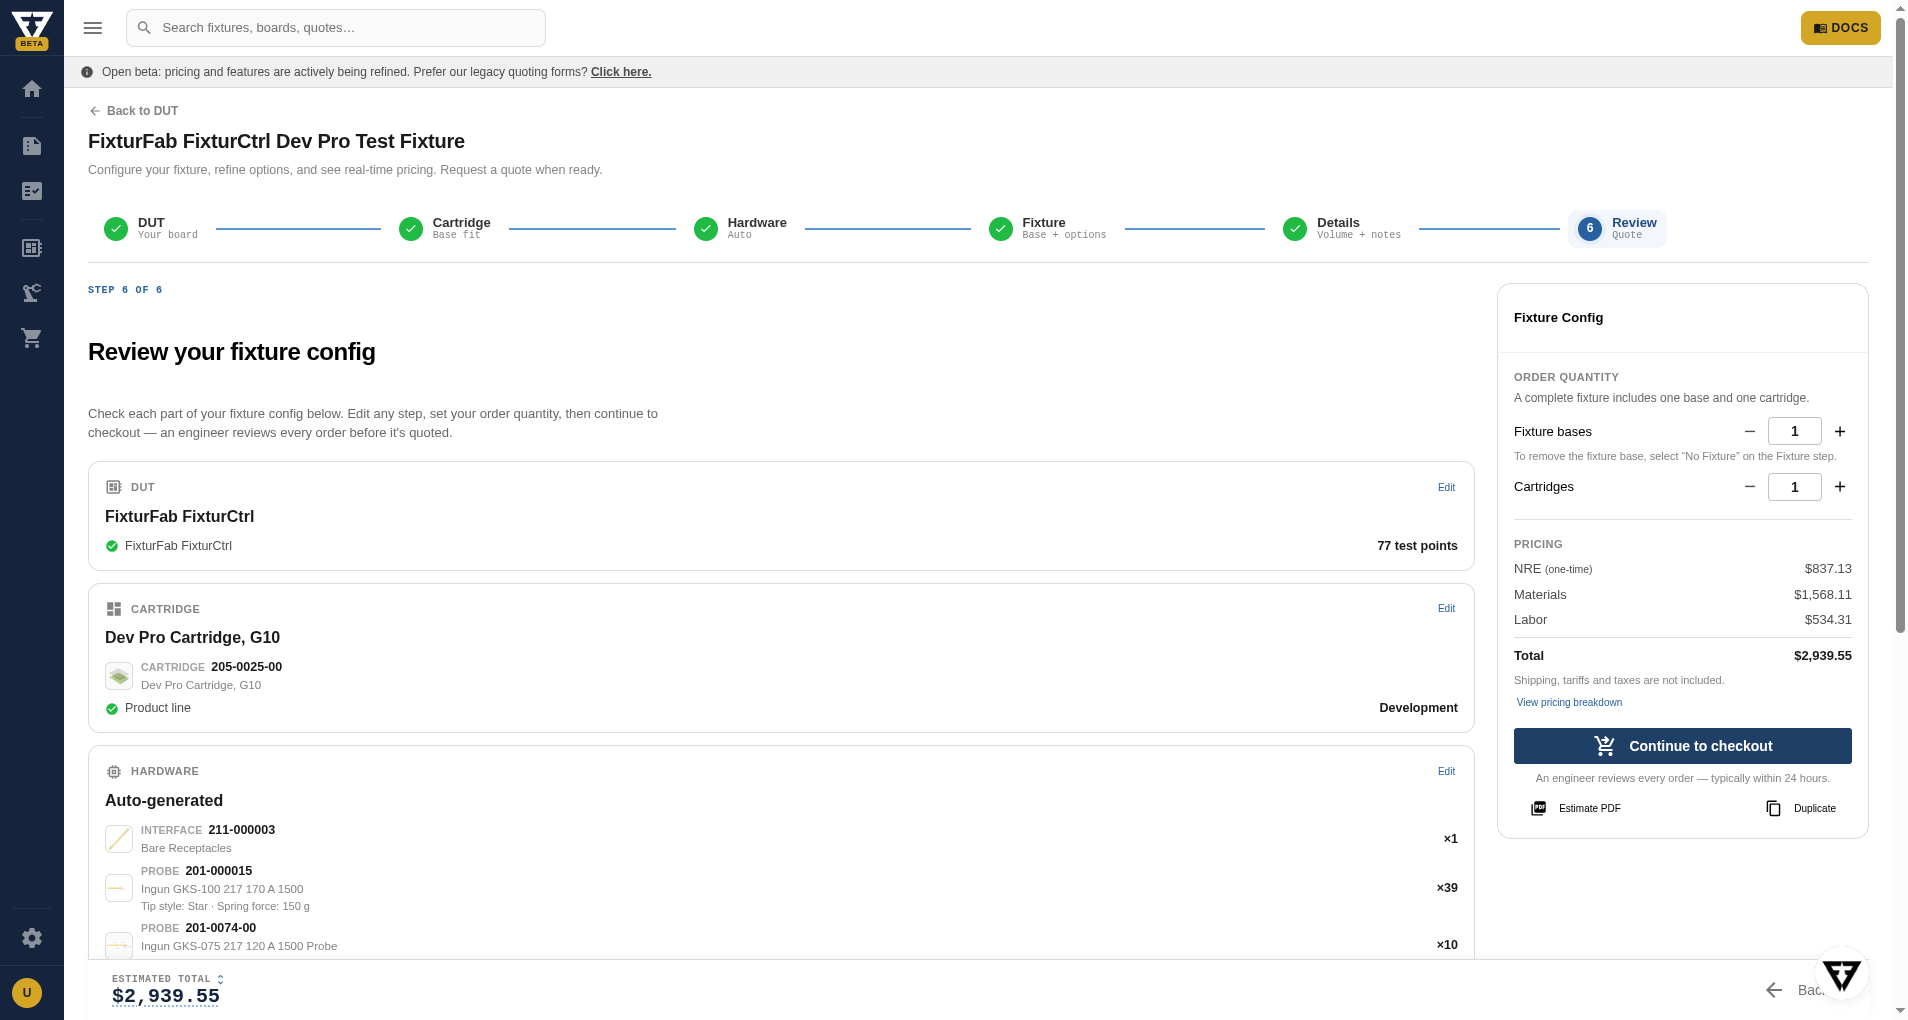
When you're ready, Continue to checkout locks the configuration and takes you to checkout for addresses and shipping. You can also download an Estimate PDF or Duplicate the configuration to explore a variation. Every order is reviewed by an engineer — typically within 24 hours — before it's quoted.