

Appearance
Advanced Hardware Configuration
The hardware Studio generates in the fixture configurator is buildable as-is for most fixtures. The advanced hardware configurator is for when an engineer needs to look under the hood — swap a specific probe, choose a different receptacle, adjust how the board is located, or pull a bill of materials. Every change is tracked as a version, so you can experiment and roll back.
You reach it from Step 3: Hardware of the configurator by expanding Advanced / engineering details on a DUT, then Open advanced hardware. It opens as a full-page editor for that board. Advanced editing is available to the configuration's owner and FixturFab staff; everyone else can open it read-only to inspect the engineering detail.
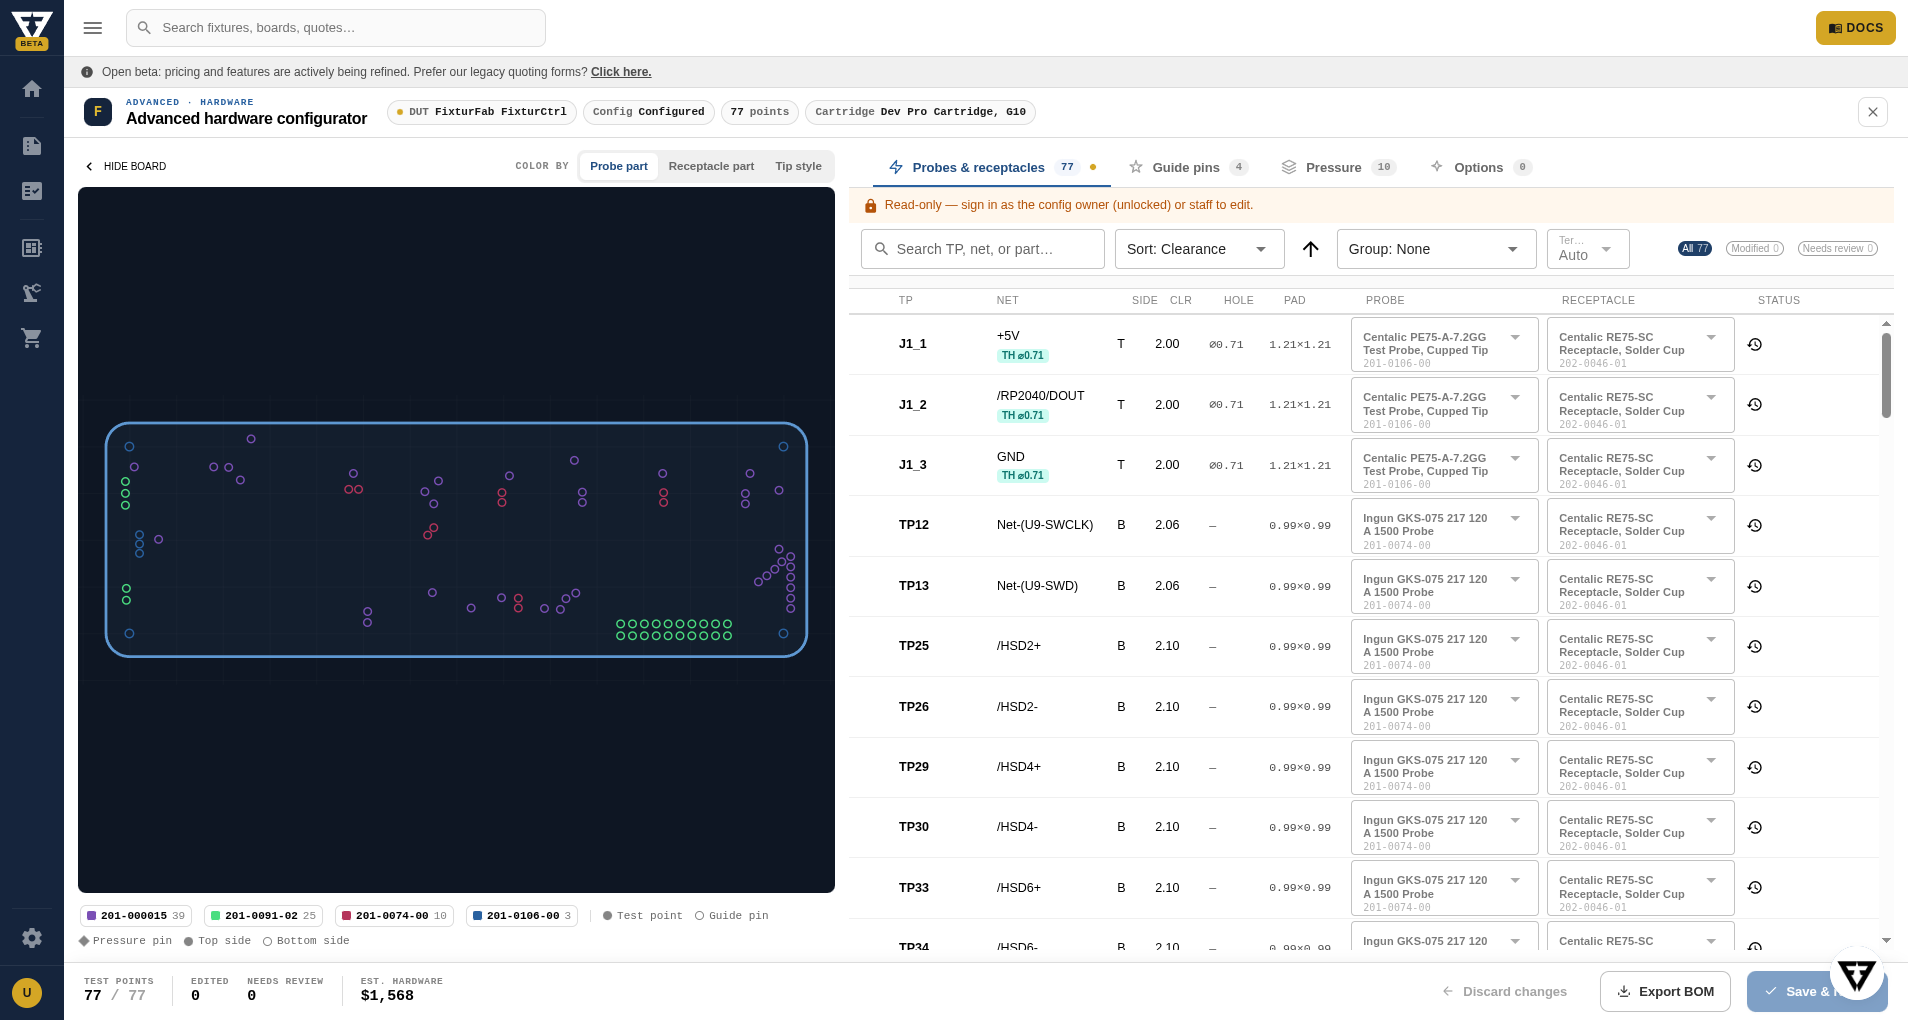
The workspace
The editor pairs an interactive board render (left) with the configuration tabs (right). Markers on the render correspond to rows in the tables — hover or click to highlight a point, and use the Color by control (probe part, receptacle part, or tip style) and the legend to focus the view. The render pane collapses if you want more room for the tables.
A breadcrumb across the top shows the active DUT (switch boards here if the fixture has more than one), the config status, the test-point count, and the cartridge. A footer along the bottom keeps a running tally — test points configured, how many you've edited, how many need an engineer's review, and the estimated hardware cost.
The configuration is split across four tabs.
Probes & receptacles
The main tab — shown above — lists every test point with its probe and receptacle selection. Each is a searchable picker: find a part by part number or name and assign it to that point. This is where you'd override an auto-selected probe — for a high-power signal, a tight-pitch pad, or a part you prefer to standardize on. Edits are flagged so you can see at a glance which points you've changed from the auto-generated baseline, and which are marked for an engineer to review. You can sort, group, and filter the list (all, modified, needs review) to find what you're looking for.
Guide pins
Set how the board is located in the cartridge — which holes take guide pins, and which part each uses. You can search the catalog for specific guide-pin parts and select holes in bulk rather than one at a time.
Pressure
Configure how hold-down pressure is applied — the pressure method and the number of pressure pins. As with the other tabs, parts come from the searchable catalog.
Options
Options come in two groups. Solution options apply across the whole fixture (for example, a shared power supply), while the DUT options below them apply to this board specifically. Toggle the ones you need; both groups support catalog search.
Versions
Hardware is versioned independently of your test config, so advanced edits don't disturb the underlying test configuration. The version chip in the top bar shows the current version and marks it when you have unsaved changes. From its menu you can save a new version or restore an earlier one — restoring discards the current unsaved edits, so you're prompted to confirm.
Saving and exporting
The footer holds the actions:
- Save & return saves your changes as a new hardware version and takes you back to the configurator.
- Discard changes reverts to the last saved version.
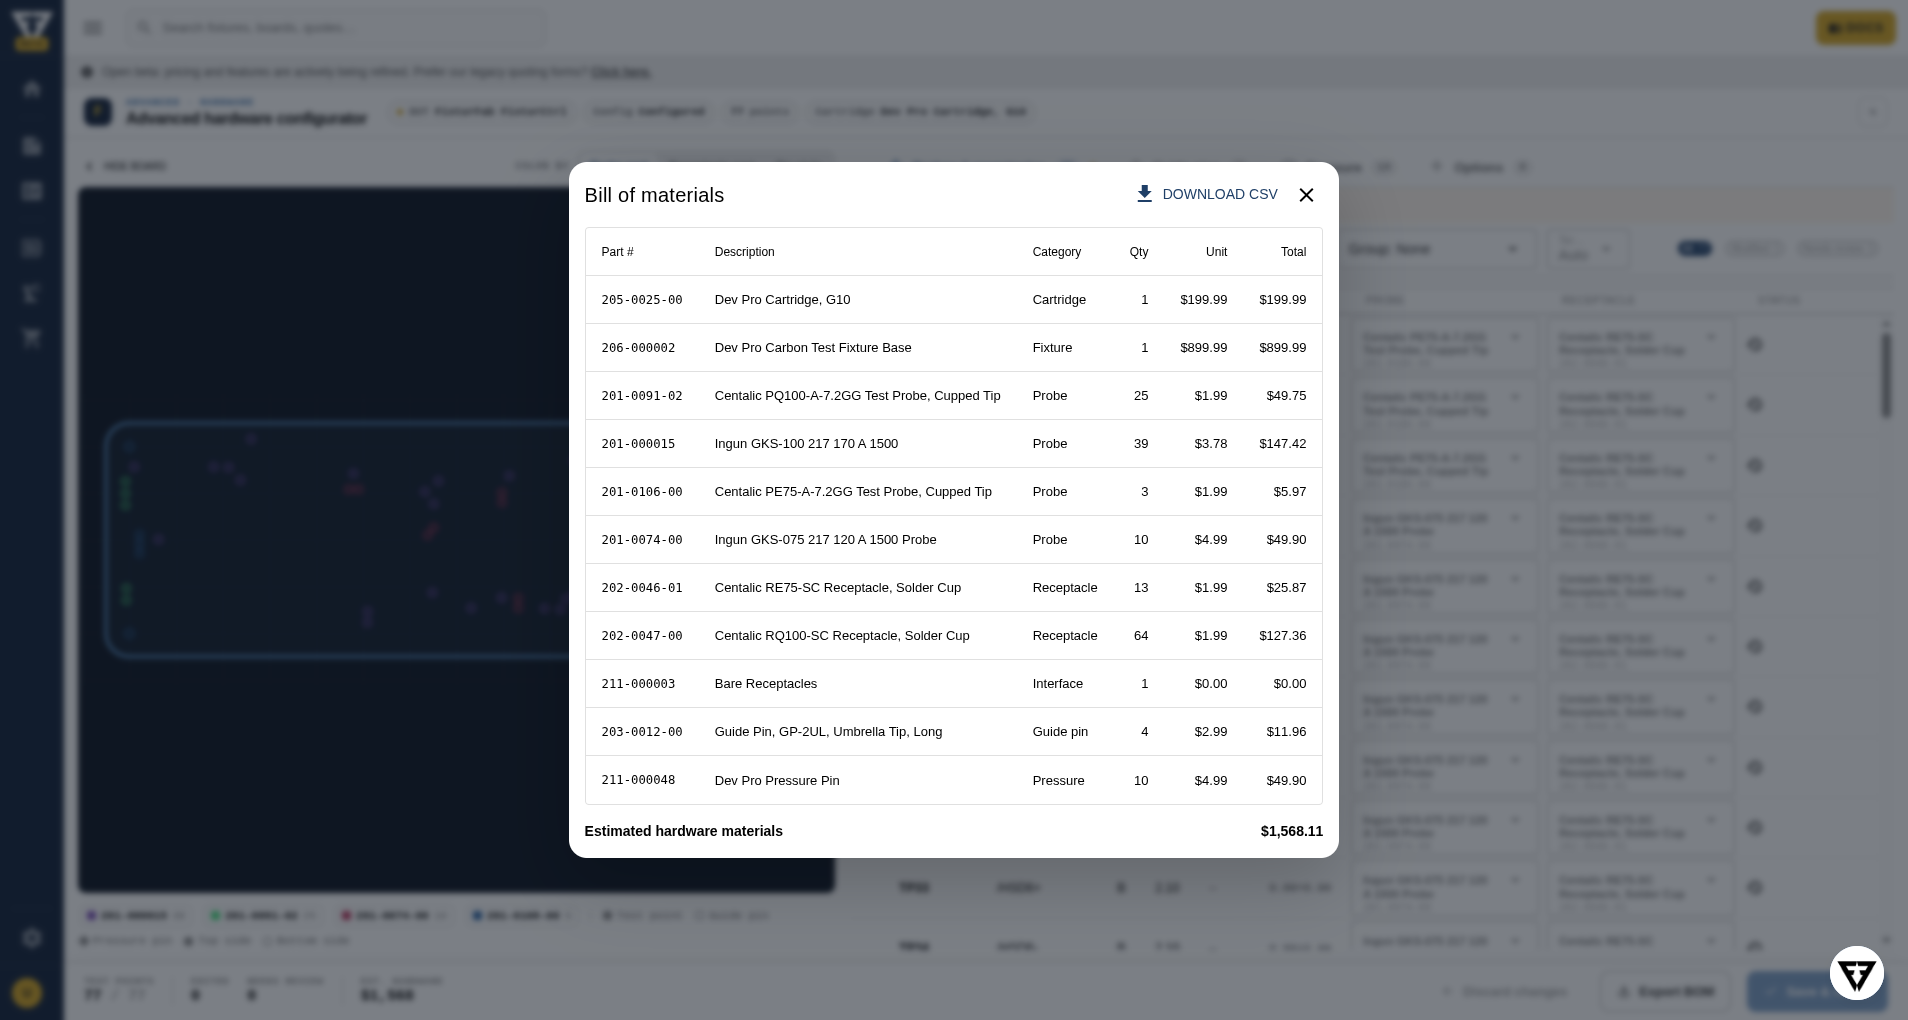
- Export BOM opens the bill of materials — every hardware part with quantities and pricing — which you can download as a CSV.
TIP
You don't have to use the advanced editor. If you only needed to glance at the engineering detail, close it and the auto-generated hardware stays as it was. Changes take effect only when you save.